Blog

  • Glass Skin Routine: 7-Step Hydration Guide for a Dewy Glow

    Glass Skin Routine: 7-Step Hydration Guide for a Dewy Glow

    📌 At a Glance (Key Takeaways)

    • Glass skin represents an intensely hydrated, smooth, and translucent complexion that reflects light like clean glass.
    • Achieving the look relies on layering multiple thin, watery hydrating steps (humectants) rather than applying heavy, occlusive oils.
    • The viral ‘7-Skin Method’ involves patting 3 to 7 thin layers of alcohol-free hydrating toner into damp skin to maximize intracellular moisture.
    • Gentle barrier maintenance and mild chemical exfoliants (like PHAs or Lactic Acid) are essential to smooth micro-roughness without causing redness.

    Look closely at skin people describe as “glass skin” and what you’re actually seeing is light behaving differently. Instead of scattering across dry, flaky patches, it slides across a smooth, water-saturated surface and reflects back evenly, the way it would off polished glass. Koreans call it yuri pibu. It isn’t makeup, and it isn’t a highlighter trick. It’s what skin looks like when its surface is genuinely smooth and deeply hydrated.

    That’s worth saying plainly, because glass skin gets misunderstood as being about “poreless” skin you’re either born with or not. Pores are a normal, necessary part of your skin, and no routine erases them. What the glass skin approach actually does is refine surface texture and keep the top layers full of water, so light has an even surface to bounce off.

    Why the order of your products matters

    The routine rests on one principle: apply from thinnest and most watery to thickest and most sealing. It sounds fussy, but the reason is real. Water can’t push through a layer of cream to reach your skin, so if you put a rich moisturizer on first, a watery toner afterward has nowhere to go. Go light to heavy and each layer gets where it needs to be.

    Here’s the sequence at a glance:

    Step Product What it does
    1–2 Oil cleanser, then a low-pH water cleanser Clears sebum, SPF, and grime without stripping
    3 Gentle PHA or lactic acid Smooths the surface a few nights a week
    4 Hydrating toner, layered Saturates the skin with water
    5 Fermented essence Adds amino acids and antioxidants
    6 Niacinamide serum Refines pores and evens tone
    7 Gel-cream, then SPF by day Seals everything in

    If the double cleanse that opens this routine is new to you, our step-by-step “Double Cleansing: Benefits for Every Skin Type” breaks it down.

    Working through the routine

    Start clean. Massage a cleansing oil or balm over dry skin to lift off makeup and sunscreen, emulsify with warm water, and rinse. Follow with a gentle water-based cleanser at a skin-friendly pH so you’re not stripping the barrier you’re about to hydrate.

    A couple of nights a week, do a light chemical exfoliation. Glass can’t reflect a rough surface, but harsh scrubs and strong peels cause the kind of inflammation that ruins the effect. Polyhydroxy acids (PHAs) or lactic acid are gentler choices that dissolve the glue holding dead cells at the surface without digging deep enough to irritate.

    Then comes the step glass skin is known for: layering a hydrating toner. This is sometimes called the “7-skin method,” though the number isn’t sacred. Pour a little alcohol-free toner into your palms and press it into your skin, and while your face is still damp, repeat it three or four times. With each pass the skin looks visibly plumper as it drinks the water in. In dry weather you might do more layers; in humidity, fewer.

    After that, an essence bridges the gap to your serums. Fermented ingredients like galactomyces or bifida ferment, and snail secretion filtrate, add lightweight peptides and hydration that give skin a bouncy, cushioned feel. Then a niacinamide serum, often paired with soothing centella, helps regulate oil, soften the look of pores, and even out tone.

    Finally, seal it. All that layered water will simply evaporate if you leave it exposed, so finish with a light gel-cream rich in ceramides and squalane. During the day, a hydrating, dewy-finish sunscreen goes on top, both to protect and to add that final glow.

    Things that get in the way

    A few common problems have simple fixes. If skin looks greasy rather than dewy, you’re probably leaning on heavy oils instead of watery layers, so swap them for toners and a light gel-cream. If small bumps appear on your forehead, you may be over-layering or not rinsing your oil cleanser fully, so cut back the toner layers and emulsify more thoroughly. And if makeup slides off over your skincare, give each layer a minute to set and stick to lightweight, water-based bases rather than heavy silicone foundations.

    Glass skin is less a single product than a habit of hydrating in thin, patient layers and protecting the result. Sleep, water, and a diet with some antioxidants all show up in how skin reflects light, so the routine works best when the rest of your life supports it rather than fights it.

    To carry the glow into your makeup, our “The No-Makeup Makeup Routine: Fresh, Natural Beauty” and “Natural Glow Makeup Trends: Radiant Looks for Modern Women” guides both build on this base.

    Frequently Asked Questions

    Can oily or acne-prone skin achieve glass skin without looking greasy?

    Yes, oily skin thrives under a glass skin regimen because the routine prioritizes water-based humectants (glycerin, hyaluronic acid, beta-glucan) rather than heavy pore-clogging oils. Dehydrated oily skin often overproduces sebum; saturating it with lightweight water hydration actually balances oil production.

    What is the difference between glass skin and honey skin?

    While both are beloved K-beauty ideals, ‘glass skin’ (yuri pibu) focuses on a smooth, poreless, translucent, and reflective glass finish through deep water hydration. ‘Honey skin’ (kkul pibu) emphasizes a richer, more supple, and glossy nourishment derived from honey and propolis.

    How long does it take to see real glass skin results?

    Immediate surface hydration and dewy radiance are visible after the very first multi-step routine. However, true glass skin—involving refined texture, balanced tone, and fortified barrier resilience—requires 3 to 4 weeks of consistent daily hydration and gentle exfoliation.

    Do you really need to apply 7 layers of toner for the 7-Skin Method?

    No, seven is simply the traditional maximum. For most skin types, patting 3 to 4 thin layers of an alcohol-free hydrating toner provides optimal saturation without product buildup or stickiness.

    Additional Details

    • Description: Achieve translucent, luminous glass skin with K-beauty hydration layering. Here is the exact 7-step routine, humectant ordering, and barrier protection tips.
    • Published: 2026-09-07T00:00:00.000Z

    Images

    • (none listed)
  • Retinol for Beginners: Safe Application Schedule and Routine

    Retinol for Beginners: Safe Application Schedule and Routine

    📌 At a Glance (Key Takeaways)

    • Retinol is a Vitamin A derivative that accelerates cellular turnover and stimulates collagen synthesis to smooth fine lines, clear acne, and refine texture.
    • Beginners should start with low concentrations (0.1% to 0.3% encapsulated retinol) rather than jumping to high-potency serums or prescription tretinoin.
    • The ‘Sandwich Method’ (moisturizer, retinol, moisturizer) provides a proven buffer that prevents dryness, flaking, and barrier disruption without diminishing efficacy.
    • Daily broad-spectrum SPF 30+ is mandatory; newly surfaced skin cells are highly vulnerable to ultraviolet damage and photodamage.

    Why do so many people give up on retinol within a few weeks? Almost always for the same reason: they went in too hard, too fast. They bought a high strength, used it every night, layered it over acids, and their skin flaked and stung until they decided retinol “wasn’t for them.” Used patiently, it’s one of the most proven ingredients in skincare. Used impatiently, it just makes your face angry.

    Retinol is a form of vitamin A. Once it’s on your skin, your cells convert it into retinoic acid, which speeds up cell turnover, helps clear pores, and nudges the skin into making more collagen over time. Dermatologists first used vitamin A derivatives for acne back in the 1970s and noticed a bonus effect: smoother texture, fewer fine lines, more even tone. That track record is why it’s still the benchmark decades later.

    Where a beginner should start

    Not all retinoids are equal in strength, and the differences matter when you’re choosing your first bottle.

    Form Strength Irritation risk Who it suits
    Retinyl palmitate Very gentle Minimal Very sensitive skin, total beginners
    Encapsulated retinol (0.1–0.3%) Moderate Low to moderate The typical sweet spot for starting out
    Retinaldehyde (retinal) High Moderate Once you’ve built tolerance
    Tretinoin (prescription) Clinical High Prescribed acne and photoaging care

    For most people, a 0.1% to 0.3% encapsulated retinol is the right starting point. Encapsulation wraps the active molecule in a shell that releases it slowly over a few hours instead of hitting your skin with everything at once, which keeps irritation down while you adjust. If you’re still setting up the basics your retinol should sit on top of, our “Skincare Basics for Beginners: Build Your Daily Routine” covers that groundwork.

    Go slow on purpose

    The process of your skin getting used to retinol is sometimes called retinization, and rushing it is exactly what causes the flaking and redness people dread. A gentle ramp looks roughly like this:

    • Weeks 1 to 2: once a week, at night only. You’re watching for how your skin responds before you build up.
    • Weeks 3 to 4: twice a week, with a couple of rest nights in between.
    • Weeks 5 to 8: every other night, if things feel calm. A little tightness is normal here; burning is not.
    • Weeks 9 onward: if your skin still feels comfortable, you can move toward most nights of the week, or simply stay at every other night. There’s no prize for going faster.

    If your skin gets irritated at any stage, drop back a step rather than pushing through. Tolerance builds; forcing it doesn’t.

    The sandwich method

    A reliable way to soften retinol for beginners is to buffer it between moisturizer, sometimes called the sandwich method:

    1. Cleanse and pat your skin fully dry. Don’t apply retinol to damp skin, since moisture speeds up penetration and, with it, irritation.
    2. Smooth on a thin layer of a light moisturizer and let it absorb for a few minutes.
    3. Dot a genuine pea-sized amount of retinol across your face. That’s the whole face, not per cheek. Keep it off your eyelids, the corners of your nose, and your lips.
    4. Wait a couple of minutes, then seal with a richer cream, ideally one with ceramides or squalane, to limit water loss overnight.

    That extra moisturizer layer cushions the skin without canceling out the retinol’s benefit.

    What to pair it with, and what to hold back

    While your skin is adjusting, keep the rest of your routine simple. Ingredient conflicts are the main trigger for irritation.

    Hyaluronic acid, ceramides, peptides, and niacinamide all pair well with retinol and help keep the barrier calm. Our “Hyaluronic Acid: How to Hydrate and Plump Your Skin” guide explains how to use it alongside actives.

    Hold these back, at least at first: glycolic and lactic acids (AHAs), salicylic acid (BHA), and physical scrubs all thin or exfoliate the surface and stack irritation on top of retinol, so use them on separate nights if at all. Vitamin C belongs in your morning routine, not layered with retinol at night.

    What to expect, and when

    Retinol rewards patience, and knowing the timeline keeps you from quitting early. The first few weeks are mostly acclimation, and some people get a burst of small breakouts as pores clear. Texture usually starts feeling smoother around the two-month mark. Pigmentation and old acne marks fade over the months after that, and the collagen-related firming happens slowly, over half a year and beyond. If you stop at week three, you never see any of it.

    Don’t neglect your neck, chest, and hands as you go, but treat them gently, since the skin there is thinner and shows irritation faster. Once a week, mixed with a rich cream, is plenty for those areas.

    One rule has no exceptions: wear sunscreen every morning. Retinol sheds the outer layer of dead cells and leaves fresher skin exposed, which is more vulnerable to UV. Skipping daytime SPF undoes the work and can worsen pigmentation. Our guide on “Daily Sunscreen Use: Why Broad-Spectrum Protection Matters” covers how to make it a habit.

    Frequently Asked Questions

    How long does the retinol purge usually last?

    The cellular purge—where micro-comedones underneath the surface are rapidly pushed upward—typically lasts between 4 and 6 weeks. If breakouts, burning, or redness persist past the 8-week mark, you are likely experiencing barrier damage rather than a purge.

    Can you use retinol around the delicate eye area?

    Standard facial retinols are too potent for the thin, delicate skin surrounding the eyes. Use a specially formulated eye cream containing low-dose encapsulated retinol with ceramides, or tap a buffer of rich eye cream around the orbital bone before applying your facial serum.

    Why should you only apply retinol at night?

    Pure retinol molecules are photolabile, meaning UV light rapidly degrades the active compound and renders it ineffective. Additionally, accelerated cellular turnover makes your skin temporarily more susceptible to UV sensitivity, making nighttime application optimal.

    Can I use Vitamin C and Retinol together?

    Avoid layering Vitamin C and Retinol directly on top of each other in the same routine, as their differing optimal pH levels cause irritation. The best practice is applying Vitamin C in the morning under sunscreen and applying Retinol at night.

    Additional Details

    • Description: Starting retinol does not have to mean irritation, redness, or peeling. Learn the sandwich method, beginner percentages, and a foolproof 12-week schedule.
    • Published: 2026-09-06T00:00:00.000Z
    • Updated: 2026-09-07T00:00:00.000Z

    Images

    • (none listed)
  • Wide-Leg Pants Styling: 8 Modern Outfits for Every Season

    📌 At a Glance (Key Takeaways)

    • Wide-leg trousers elongate the vertical line of the body by creating an unbroken, fluid silhouette from natural waist to shoe.
    • The fundamental rule of wide-leg styling is balancing volume: pair voluminous bottoms with fitted, tucked, or cropped tops to maintain waist definition.
    • The trouser hem break dictates the entire aesthetic: the front hem should skim the top of the shoe with a single soft break, clearing the floor by 0.5 inches.
    • Footwear selection is critical: pointed-toe boots and slingbacks elongate the leg line, while low-profile retro sneakers deliver relaxed street polish.

    There’s one rule that makes wide-leg trousers work almost every time: keep the top half fitted. A snug knit, a tucked shirt, a cropped jacket that lands at your waist — anything that marks where your waist is will let the trousers do their thing, which is fall in a long, clean line to the floor. Get that balance wrong and even beautiful trousers read as shapeless. Get it right and the plainest outfit looks considered.

    That’s really the whole trick, and everything below is just variations on it.

    Why the wide leg stuck around

    Skinny jeans had a good long run, but the shift to relaxed tailoring wasn’t only about trends catching up. Wide-leg trousers are more comfortable, obviously, but they also flatter more bodies. Because the fabric drapes straight down from your waist rather than tracing every curve, it reads as long and unbroken — which is why they can make a five-foot frame look taller and a tall frame look effortless. Cut them from linen and they’re a summer staple; cut them from pleated wool and they’re office-ready. Same silhouette, completely different mood depending on the cloth.

    Balancing the volume

    The mistake we see most often is loose on loose: an oversized top with the wide trousers and nothing to break it up. It can be done as a deliberate editorial move, but for everyday wear you want an anchor point. A few reliable ways to get one:

    • Tuck something in. A ribbed mock-neck or a bodysuit tucks flat into the waistband without bunching, and suddenly your waist is defined.
    • Try the front tuck. With a looser button-down, tuck just the front center hem and leave the rest out. It marks the waist while keeping things relaxed.
    • Crop the jacket. A blazer or bomber that hits right at your waistband gives you that shorter-top, longer-bottom ratio that lengthens the legs.

    Shoes change everything

    Footwear decides how formal wide-leg trousers read, and it decides the line of the whole outfit. A rough guide:

    Shoe Works best with Effect
    Pointed leather boots Heavy wool or pleated suiting Maximum leg-lengthening; let the hem cover the shaft
    Low retro sneakers Cotton twill or relaxed denim Easy, casual; keep the profile flat
    Strappy heels Fluid silk or linen Evening polish; barely-there straps keep the ankle light
    Penny loafers Structured wool or twill Classic; leave a little clearance so the hem doesn’t drag
    Chunky lug soles Canvas or cargo wide-legs Streetwear edge that balances heavier coats

    The one constant: the hem length has to suit the shoe. More on that below.

    Outfits to steal

    You don’t need dozens of formulas, just a handful you can rearrange. These are the ones we come back to.

    The all-charcoal look — pleated charcoal trousers, a matching fine-gauge turtleneck, pointed black boots, an oversized blazer. Tonal dressing like this always looks more expensive than it is.

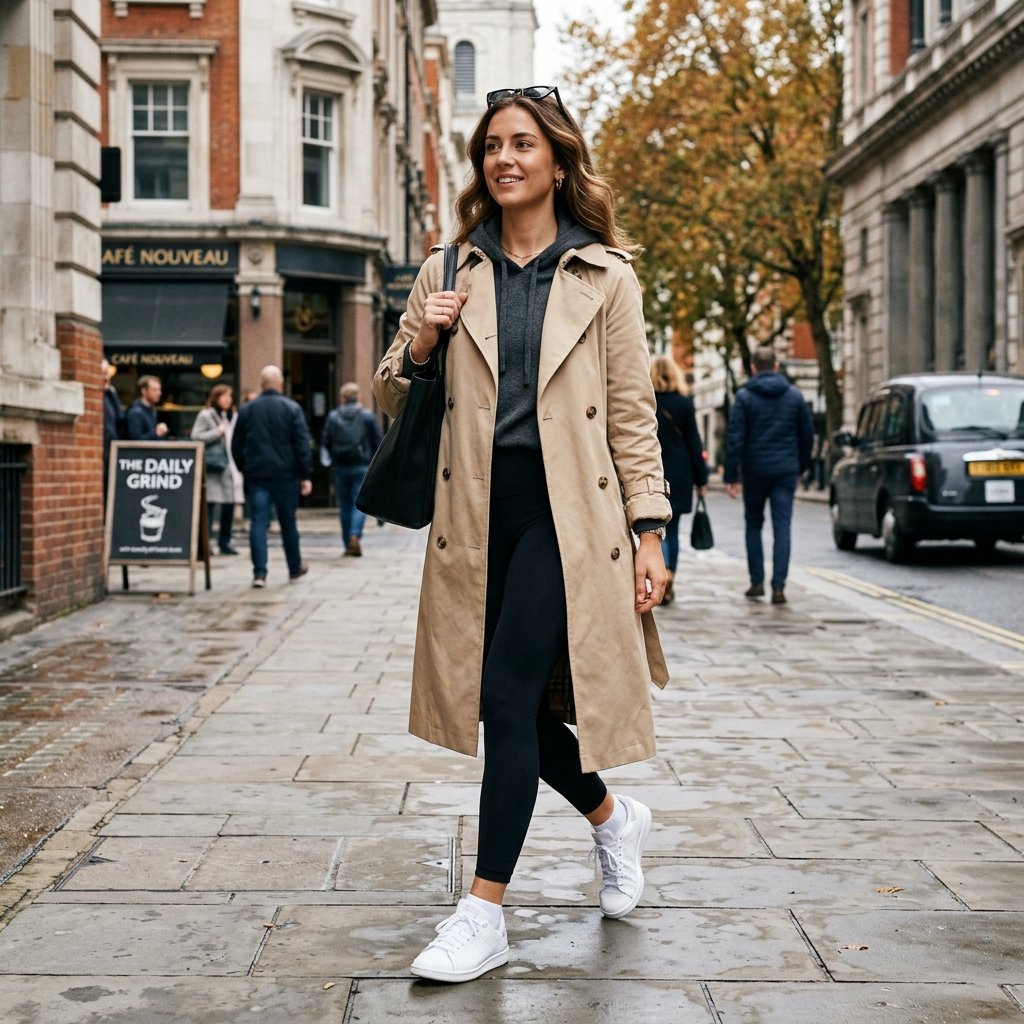
    The Breton weekend — navy wide-legs, a navy-and-white striped tee tucked at the waist, white sneakers, a camel trench thrown over the shoulders. Coffee-run reliable.

    The summer linen set — oat linen trousers with a matching fitted linen vest, tan slides, a raffia tote, a bit of thin gold jewelry.

    The cropped-leather version — cream denim wide-legs, a fitted black tee, a short black moto jacket, pointed Chelsea boots. Sharp and a little downtown.

    The cozy front-tuck — fluid taupe wool trousers, an oversized cream sweater with just the front tucked, brown loafers, a suede shoulder bag.

    The evening one — black wide-legs in fluid crepe, a black silk cami, an unbuttoned tuxedo blazer, delicate heeled sandals, gold drop earrings.

    For more everyday combinations, our “Casual Outfit Ideas: Effortless Daily Looks” guide has plenty, and if you’re dressing for shifting temperatures, see “Summer to Fall Transitional Style”.

    Let the fabric decide the occasion

    Fabric matters more with wide-leg trousers than with almost anything else, because the whole point is how they drape and move.

    High-twist and tropical wool is the year-round workhorse — it resists creasing, holds a pleat, and recovers after a long day at a desk or on a plane. Heavy cotton twill and chino hold a stiffer, more architectural shape, which is why they read casual; pair them with tees and sneakers. Pure linen gives you that breezy, rumpled look but wrinkles the moment you sit, so a linen-viscose blend is often the smarter buy — you keep the texture and lose some of the creasing. And silk or heavy crepe is strictly for evenings, when the fabric catches the light and ripples as you walk; balance all that fluidity with something structured up top.

    Getting the hem right

    A dragging, frayed hem or an awkward ankle gap will undo an otherwise good pair of trousers faster than anything. In our experience it’s worth a trip to the tailor, and it helps to know what to ask for.

    For flats and sneakers, aim for a soft break — the hem grazes the top of the shoe and sits maybe half an inch off the floor at the heel. For heels or boots, bring the actual shoes to the tailor and hem so the fabric falls within a quarter inch of the ground, covering the heel as you walk. And remember that lighter fabrics float and can catch, so they often want to sit a touch shorter, while heavy wool hangs straight and can carry a longer, cleaner line.

    One last habit worth building: steam these, don’t iron them flat, and hang them from clamp hangers by the hem so gravity pulls the wrinkles out. Wool especially will thank you.

    Frequently Asked Questions

    Can petite women wear wide-leg trousers without looking overwhelmed?

    Yes, wide-leg trousers are exceptionally flattering on petite frames when styled properly. Choose a high-rise waist to visually lengthen the legs, ensure the hem just skims the floor with a 1.5–2 inch heel or pointed boot, and wear a fitted, tucked-in top to prevent volume overload.

    What shoes should you never wear with wide-leg pants?

    Avoid bulky, round-toe running sneakers or clunky platform shoes with wide rounded toe boxes, as they visually cut off the leg line and cause the fabric to bunch awkwardly. Opt instead for pointed-toe shoes, slim low-profile sneakers, or sleek almond-toe boots.

    How should wide-leg trousers fit around the hips and waist?

    Wide-leg pants should fit snugly and smoothly through the natural waist and upper hip without pulling or gaping at the pleats. The fabric should cascade freely from the widest part of your hip downward into a fluid, straight drape.

    Do pleated wide-leg pants add bulk to the stomach area?

    When properly tailored, front pleats actually create vertical lines that camouflage midsection curves and allow the fabric to fall smoothly over the hips. Ensure the pants fit your waist properly so the pleats lie flat rather than pulling open.

    Additional Details

    • Description: Wide-leg trousers elongate your silhouette and offer effortless polish. Learn the rule of proportions, the best shoes to pair, and 8 versatile outfit formulas.
    • Published: 2026-09-05T00:00:00.000Z
    • Updated: 2026-09-07T00:00:00.000Z

    Images

    • (none listed)
  • Quiet Luxury Style: How to Build an Understated Capsule Wardrobe

    Quiet Luxury Style: How to Build an Understated Capsule Wardrobe

    📌 At a Glance (Key Takeaways)

    • Quiet luxury prioritizes fabric composition, structural tailoring, and discreet finishing over overt designer logos or fleeting micro-trends.
    • Building the aesthetic centers on high-grade natural fibers: long-staple cashmere, double-faced wool, crisp poplin cotton, and heavy Mulberry silk.
    • The color palette relies on cohesive tonal neutrals: alabaster, oatmeal, rich camel, deep espresso, slate navy, and soft charcoal.
    • A tailored fit is non-negotiable; spending $20 to have trousers hemmed or blazers nipped transforms accessible garments into luxury pieces.

    Quiet luxury is not about spending more. That’s the misunderstanding that trips people up: they assume the look requires a designer budget, when the whole idea is the opposite. It’s a way of dressing that signals nothing about price and everything about judgment — natural fibers, clean construction, colors that agree with each other. The logo-free tote and the cashmere with no branding aren’t hiding wealth so much as declining to perform it.

    You’ve probably seen it called “old money” or “stealth wealth.” Strip away the nicknames and what’s left is a fairly practical proposition: buy fewer things, buy them better, and learn to tell the difference. That last part is the skill, and it’s learnable on any budget.

    Read the fabric first

    Before you look at the cut or the price tag, turn the garment inside out and read the care label. Fast fashion leans on acrylic, polyester, and nylon — fibers that pill after a couple of washes, trap heat, and never quite drape right. The materials that carry this aesthetic are almost always natural:

    • Cashmere and merino for softness and warmth without bulk, with a matte finish rather than a synthetic sheen.
    • Long-staple cotton (Pima, Egyptian) for shirting that holds its shape through the day.
    • Silk and heavy satin for a fluid drape that catches soft light instead of glaring under it.
    • Linen for structured, breathable texture that only improves with washing.

    None of this requires a boutique. Plenty of high-street retailers run limited natural-fiber lines; you just have to filter past the polyester to find them.

    Fit is what money usually buys

    The real gap between a $150 trouser and an $800 one is often just fit. Off-the-rack clothes are cut for a generic average, not for you. Spending twenty or thirty dollars at a local tailor to hem a trouser to your exact shoe break, nip in a blazer waist, or shorten a sleeve so a sliver of wrist shows will do more for how expensive something looks than doubling your clothing budget. We’d argue it’s the single highest-return move in all of this.

    The small tells

    A few details quietly separate considered clothing from the rest. Hardware is one: brushed brass, horn, mother-of-pearl, and matte tortoiseshell read as intentional, while shiny branded buckles and monogram zipper pulls date a piece instantly. Bags follow the same logic — clean lines, unbranded leather, a surface that ages into a patina rather than announcing itself.

    Color is the other. This style lives on a muted, tonal spectrum that mixes without clashing.

    Family Core shades How to pair
    Warm ivories Cream, alabaster, oatmeal Mix knit textures — cable against silk
    Rich earths Camel, cognac, espresso Anchor lighter creams; lean into gold jewelry
    Cool neutrals Navy, slate, black Sharpen with white poplin for office days
    Soft herbals Sage, olive, khaki Relaxed weekend layering

    For more on building outfits within a single color family, our “Monochromatic Outfits” guide goes deep on tonal dressing.

    The pieces worth anchoring around

    You don’t need a long list. A handful of well-chosen anchors will carry you from a workday to a weekend without much thought:

    1. A tailored wool coat in camel, charcoal, or navy, with no external branding.
    2. A relaxed cashmere crewneck in ivory or taupe.
    3. High-waisted pleated trousers in a mid-weight wool blend.
    4. A crisp cotton poplin shirt in white or a faint blue stripe.
    5. A single-breasted blazer, slightly relaxed through the shoulder.
    6. A bias-cut silk midi skirt in champagne, black, or chocolate.
    7. An unbranded structured leather tote.
    8. A slim almond-toe loafer in black or burgundy.
    9. A classic leather-strap watch.
    10. A cotton-gabardine trench in honey or khaki.

    If you’re starting from nothing, our “Capsule Wardrobe Basics” guide is the place to begin, and “Office Outfit Ideas” covers the professional end in more detail.

    Where to spend and where to hold back

    Building this wardrobe is about allocation, not abundance. The reliable rule: invest in the things that last decades and take the friction, and save on the trend-adjacent and the seasonal.

    Put your money into outerwear (a good wool coat and a proper trench will outlive a dozen trend jackets), into leather (loafers, boots, a structured bag), into tailored bottoms, and into cashmere knitwear that resists pilling. Save on everyday cotton tees, ribbed tanks, canvas espadrilles, summer totes, and basic denim — these do their job perfectly well at mid-tier prices.

    Doing it on a real budget

    Consignment is the shortcut nobody talks about enough. The RealReal, Vestiaire, and local vintage shops are full of Max Mara coats, Ralph Lauren wool blazers, and classic trousers at a fraction of retail, and buying them secondhand is both cheaper and kinder to the planet. Beyond that, filter your online searches by fiber composition rather than by trend, and take care of what you own — a cashmere comb for pilling, cedar against moths, a steamer instead of harsh dry cleaning that strips wool of its natural oils. The clothes last longer, which is rather the entire point.

    Frequently Asked Questions

    Can you achieve quiet luxury without spending a designer budget?

    Yes, absolutely. Quiet luxury is governed by material composition, color harmony, and fit rather than brand tags. Sourcing 100% natural fibers (linen, wool, cotton) from mid-tier brands or vintage consignment stores and taking them to a local tailor achieves the identical look of luxury fashion houses.

    What is the biggest difference between quiet luxury and minimal fashion?

    While minimalism focuses on reducing the number of items and embracing simple geometric shapes, quiet luxury specifically emphasizes tactile richness, premium fabric density, subtle heritage textures (like herringbone or ribbing), and effortless elegance.

    What shoes work best with a quiet luxury wardrobe?

    The quiet luxury aesthetic favors understated, logo-free leather footwear: almond-toe or square-toe leather loafers, minimalist riding boots, pointed-toe kitten heels, elegant leather slingbacks, and clean, unbranded low-profile white leather sneakers.

    How do you accessorize a quiet luxury outfit without looking plain?

    Focus on micro-details: delicate solid gold or gold-vermeil chains, subtle pearl or huggie earrings, a slim leather belt with brushed brass hardware, structured unbranded leather handbags, and a classic vintage-inspired tank watch.

    Additional Details

    • Description: Quiet luxury is about timeless fabrics, immaculate tailoring, and logo-free confidence. Here is how to curate an understated high-end wardrobe on any budget.
    • Published: 2026-09-04T00:00:00.000Z
    • Updated: 2026-09-07T00:00:00.000Z

    Images

    • (none listed)
  • Chrome Nails: How to Get the Glazed Donut Finish at Home

    Chrome Nails: How to Get the Glazed Donut Finish at Home

    📌 At a Glance (Key Takeaways)

    • Chrome nails achieve their reflective mirror shine through ultra-fine micronized metallic powder buffed onto a semi-cured non-wipe top coat.
    • The secret to a mirror finish instead of a glittery mess is flash-curing your non-wipe top coat for exactly 30 seconds rather than a full 60 seconds.
    • Different base shades produce entirely distinct aesthetics—milky white produces the iconic glazed donut look, while nude delivers a warm champagne glow.
    • Sealing the free edge with base coat before your final top coat is mandatory to prevent chrome powder from chipping at the tip within 48 hours.

    Here is the single detail that decides whether your chrome manicure looks like a liquid mirror or a patchy mess: you cure the top coat for 30 seconds, not the usual 60. Everything else is easy. That short cure leaves the surface warm and slightly tacky, which is exactly what the powder needs to grab onto. Cure it fully and the surface turns glass-slick and repels the pigment. Get the timing right and the rest of the process is almost foolproof.

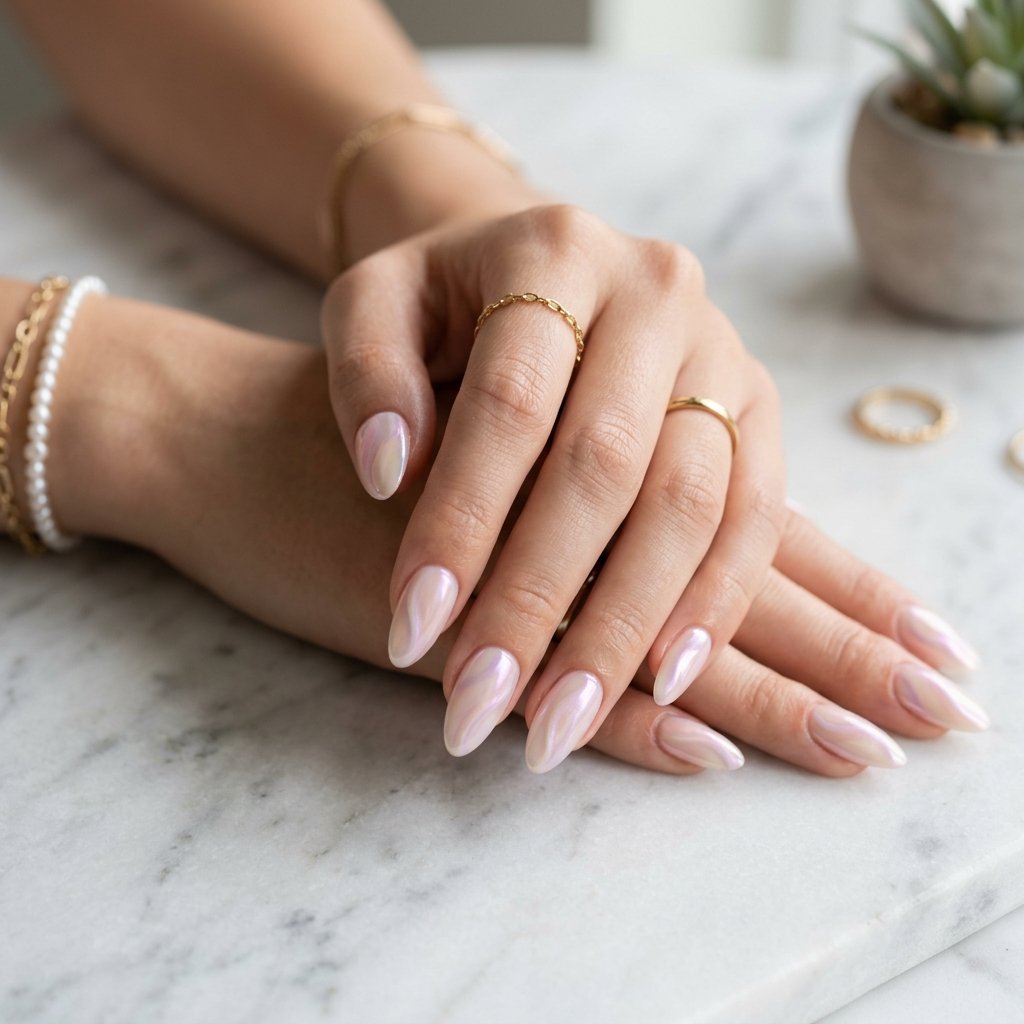
    Chrome has quietly shifted from a loud, futuristic salon trick into something you’d wear to the office. The mercury-silver and high-voltage golds of a few years ago have given way to the soft, pearly “glazed donut” finish, a sheer neutral base with a whisper of white or aurora powder over the top. It reads more like porcelain or blown glass than metal, and it flatters almost every nail shape.

    Your base color changes everything

    Chrome powder is semi-transparent, so whatever sits underneath shows through and shifts the final color. One jar of white pearl powder can give you five different manicures depending on the base you pair it with.

    Base shade Powder Result Good for
    Sheer milky white Pearl / aurora The classic glazed-donut opalescence Everyday, minimalist
    Warm sheer nude Champagne gold Soft cashmere glaze Autumn, transitional outfits
    Soft baby pink White chrome Rose-quartz sheen Bridal, spring
    Deep espresso or black Silver / holo Liquid obsidian mirror Evening, bold winter looks
    Pastel peach Golden aurora Sunset iridescence Summer, vacation

    If you’re planning something romantic, our “Wedding Nail Ideas for Every Bride” guide leans into the soft pearl end of this range, and the warmer variations turn up again in “Summer Nail Ideas Trending Now”.

    What you actually need

    You can skip most of the gadgets sold as “chrome kits,” but two things are non-negotiable. First, a real no-wipe gel top coat: standard top coats leave an oily dispersion layer that dissolves the powder into muddy streaks. Second, powder milled fine, roughly 10 to 15 microns. Coarser cosmetic glitter will never fuse into a continuous reflection, no matter how long you rub. Beyond that you need a curing lamp of about 36 watts or more, a silicone applicator or a dense eyeshadow sponge (they generate friction without shedding lint), and a soft brush to dust off the excess.

    The application, step by step

    Start with clean, prepped nails and your sheer base color. Apply one thin coat and cure it fully for 60 seconds; add a second thin coat if you want more opacity.

    Now the layer that matters. Brush on an even coat of no-wipe top coat and cure it for exactly 25 to 30 seconds, adjusting for your lamp’s power. Then pick up a tiny pinch of powder on your applicator, start at the center of the nail, and rub in firm circles and back-and-forth strokes. The cloudy powder tightens into a seamless reflective surface as you work it in. A little goes a long way; a pinch covers two nails.

    Once every nail is burnished, sweep away the loose powder with a soft brush, getting into the sidewalls and skin. Stray pigment left on the surface will streak your final coat and contaminate your top coat bottle.

    The last step is what keeps chrome from peeling at the tips, and most people skip it. Chrome is essentially an inorganic dust, and gel doesn’t bond well to it. So paint a micro-thin layer of gel base coat over the chrome first, capping the free edge, and cure for 30 seconds; the bonding resins in base coat grip the powder. Only then seal with your no-wipe top coat, cap the edge again, and cure for a full 60 seconds. In our testing, that base-then-top sandwich is the difference between three weeks of wear and chipping by day four.

    Shifting it through the seasons

    Glazed chrome works year-round, but nudging the undertones with the light keeps it from feeling repetitive:

    • Spring: aurora powder over sheer lavender or peach reads like an iridescent rainbow in soft daylight.
    • Summer: warm gold chrome over a caramel or honey jelly base gives a molten, sun-drenched finish that suits gold jewelry.
    • Autumn: graphite or champagne over taupe, olive, or cocoa tones the shine down to an antique satin.
    • Winter: silver-white over pale slate or milky blue looks like frost on glass, festive without loud holiday glitter.

    When it goes wrong

    A few problems come up again and again, and all of them trace back to one or two causes.

    If the powder wipes off and won’t stick, you over-cured the top coat. Reapply a thin layer and cut your lamp time to 25 seconds. If the finish looks dull or clouded after the final coat, you likely used a solvent wipe or a top coat containing alcohol that dissolved the delicate metallic layer; switch to a dedicated no-wipe top coat and leave the surface untouched until it cools. If you’re seeing tiny specks and dimples in the reflection, that’s dust or lint settling before the cure, so work in a draft-free spot and check each nail under bright light before it goes in the lamp.

    One small habit protects the finish long term: after that last cure, wait a minute for the gel to cool before you cleanse anything with alcohol. Wiping a hot top coat can cause micro-cracks that dull the mirror.

    For more classic looks, our tutorial on “French Tip Nails: Modern Variations on the Classic Look” and our seasonal roundup of “Fall Nail Colors: The Trendiest Shades This Season” pair well with a chrome accent nail.

    Frequently Asked Questions

    Why does my chrome powder look glittery instead of smooth like glass?

    Glittery chrome is caused by an over-cured top coat or low-grade powder. If you cure your non-wipe top coat for a full 60 seconds, the surface becomes too slick and hard for the microscopic pigments to burnish flat. Reduce your cure time to 25–30 seconds.

    Can you apply chrome powder over regular air-dry nail polish?

    Traditional air-dry polish dries by solvent evaporation and lacks the tacky-yet-firm molecular surface needed to buff chrome pigment flat. While water-based peel-off coats exist, an LED/UV gel system with a non-wipe top coat is required for an authentic mirror finish.

    Why do my chrome nails start peeling from the tips after two days?

    Chrome powder is an ultra-fine dry pigment that disrupts adhesion between gel layers. If you buff powder over the very edge of the nail, your final top coat cannot bond to the layer beneath. You must gently file the free edge and cap it with base coat before final top-coating.

    What is the best base color for Hailey Bieber glazed donut nails?

    The classic glazed donut finish requires a sheer, translucent milky white gel polish (such as OPI Funny Bunny or a thin milky builder gel). The white gives a clean base without overpowering the iridescent pearl reflection of the chrome.

    Additional Details

    • Description: Master the viral glazed donut chrome nail trend at home. From choosing ultra-fine powders to curing times and non-wipe top coats, here is your foolproof tutorial.
    • Published: 2026-09-03T00:00:00.000Z
    • Updated: 2026-09-07T00:00:00.000Z

    Images

    • (none listed)
  • BIAB Nails: Complete Guide to Builder Gel Manicures

    📌 At a Glance (Key Takeaways)

    • BIAB (Builder in a Bottle) is a thick, flexible soak-off builder gel that reinforces natural nails without harsh extensions.
    • Lasts 3 to 4 weeks between infills, making it far more durable than traditional gel polish while causing significantly less damage than acrylics.
    • Formulated with an optimal balance of flexibility and strength that bends slightly with the natural nail rather than snapping.
    • Requires professional infills or gentle acetone soaking; peeling or prying builder gel causes severe keratin layer stripping.

    Is BIAB just a fancy name for acrylic? It’s the question every client seems to arrive with, and the answer is no, not even close. BIAB stands for “Builder in a Bottle,” a term coined by The GelBottle Inc that’s since become shorthand for almost any bottled builder gel. It’s a soak-off gel thick enough to build structure onto the natural nail, and its whole reason for existing is the opposite of acrylic’s: instead of gluing on rigid length, it reinforces the nail you already have so it can grow.

    The reason it caught on so fast is flexibility. Builder gel sits somewhere between a hard gel and a soft one. Formulated with flexible oligomers, it moves with your nail plate rather than against it. Tap your nail on a doorframe or jam a finger, and the gel flexes a fraction of a millimeter and absorbs the shock instead of snapping off and taking a layer of your natural nail with it. That single property is why so many salons pivoted away from heavy acrylic extensions toward natural-nail rehab.

    How it stacks up against the alternatives

    If you’ve only ever had gel polish or acrylics, the differences are worth seeing side by side.

    BIAB (builder gel) Gel polish Acrylics Dip powder
    Main job Strengthen and support growth Color, light protection Rigid artificial length Hardened color overlay
    Flexibility High High Very low Low
    Typical wear 3–4 weeks 10–14 days 2–3 weeks 2–3 weeks
    Nail damage Very low Low Moderate to high Moderate
    Infills? Yes No Yes Usually not

    The takeaway: builder gel gives you acrylic-level wear time with far gentler prep, and you can infill it rather than soaking it off every visit. Our piece on “The Healthiest Ways to Strengthen Brittle Natural Nails” digs further into how overlays interact with keratin underneath.

    Who it actually helps

    BIAB looks lovely on anyone, but a few people see genuinely transformative results.

    Chronic nail biters are the clearest case. Biting is usually triggered by a rough edge or a hangnail that your fingers keep finding. A smooth, blunt builder-gel shell removes those triggers and makes biting tactilely unrewarding, which buys the nail bed the uninterrupted weeks it needs to reattach and grow. People with thin, papery, bendable nails are the second group; a single arched layer of builder gel distributes pressure across the plate and stops the horizontal peeling that ordinary polish can’t touch. And anyone coming off long-term acrylics benefits from a protective overlay while the thinned, sensitive natural nail grows back out over the next four to six months.

    What a proper application looks like

    Four weeks of lift-free wear comes down to prep. Here’s the sequence a good technician follows:

    1. Dry cuticle work. Using a gentle steel pusher or a soft e-file bit, they clear away the non-living tissue clinging to the nail plate. Any skin cell left behind stops the gel bonding and causes lifting.
    2. De-shine. A light pass with a 240-grit buffer removes the natural oil sheen without thinning the nail.
    3. Dehydrate and prime. A dehydrator strips residual oil and moisture, followed by a thin coat of non-acid primer.
    4. Slip layer. A micro-thin layer of builder gel goes on and stays uncured, acting as a guide for the main bead.
    5. Build the apex. A bead of gel is placed near the cuticle and floated down the center of the nail. Flipping the hand palm-up for several seconds lets gravity settle it into a smooth arch over the nail’s stress zone.
    6. Cure and finish. A low-heat cure of 60 to 90 seconds prevents that hot flash of exothermic heat, then the surface is refined and sealed with a gloss or matte top coat.

    Don’t skip your infill

    One of the best things about builder gel is that it doesn’t need a full acetone soak every visit. The technician files back the top layer, checks for lifting, blends the regrowth, and rebalances. But timing matters more than people realize.

    In the first two weeks the apex sits right over the stress zone and everything feels sturdy and light. By week three, a couple of millimeters of natural nail have grown in and the apex has crept forward. Week four is the sweet spot for an infill; the weight has shifted toward the free edge and needs rebalancing. Push past week five and that heavy bead is now well past your fingertip, so every tap creates leverage against the thinner cuticle area, which leads to pocket lifting, trapped water, and eventually the greenish tinge of a bacterial “greenie.” Book the infill on time and none of that happens.

    Keeping it looking good, and taking it off safely

    Day to day, the maintenance is simple. Oil your cuticles with jojoba twice a day; its small molecules actually penetrate both the gel and the keratin, keeping everything flexible. Treat your nails as decoration, not tools. Wear gloves for cleaning, since alkaline detergents break down the plasticizers in the gel. And go easy on long hot baths for the first 24 hours while the polymers finish stabilizing.

    When you want a break, never peel or bite it off. Peeling a gel overlay can tear away a third to half of your dorsal nail layers and leave you with raw, thin nails for months. Instead, file down about 80% of the bulk with a coarse file, soak cotton pads in pure acetone, wrap each fingertip in foil, and wait 20 to 25 minutes until the gel goes crumbly. Nudge it off gently with a wooden stick, re-wrapping any stubborn spots rather than scraping, then flood everything with cuticle oil and a rich hand balm.

    For ways to style your reinforced nails, browse “Short Nail Designs: Chic and Minimal Nail Art” and “French Tip Nails: Modern Variations on the Classic”.

    Frequently Asked Questions

    Can BIAB help short or severely bitten nails grow out?

    Yes, BIAB is considered the gold standard for recovering nail biters and brittle nails. Because builder gel creates a thick, durable protective armor over the nail bed, the underlying natural nail is shielded from physical trauma and biting impulses, allowing uninterrupted growth.

    How often do you need an infill with BIAB nails?

    Most clients require an infill every 3 to 4 weeks. Waiting longer than four weeks shifts the reinforced apex too far forward toward the free edge, which increases leverage and makes the nail prone to breaking or lifting.

    Can you take off BIAB at home safely?

    While professional salon removal is recommended, you can remove BIAB at home by gently filing down the top shiny layer and soaking your nails in 100% pure acetone using foil wraps for 20 to 25 minutes. Never force or pry the product off.

    What is the key difference between BIAB and standard gel polish?

    Standard gel polish provides color and minor shine but lacks structural strength. BIAB is a viscous oligomer gel that can build an apex, correct uneven nail ridges, and withstand heavy daily stress without chipping.

    Additional Details

    • Description: BIAB (Builder in a Bottle) is revolutionizing natural nail care. Learn how builder gel strengthens weak nails, how it compares to acrylics, and how to maintain it.
    • Published: 2026-09-02T00:00:00.000Z
    • Updated: 2026-09-07T00:00:00.000Z

    Images

    • (none listed)
  • Butterfly Haircut: How to Layer and Style the 90s Cut

    Butterfly Haircut: How to Layer and Style the 90s Cut

    📌 At a Glance (Key Takeaways)

    • Combines chin-grazing front layers with long, cascading perimeter layers for optical short-hair illusion.
    • Best suited for medium-to-dense hair textures with natural waves or straight patterns.
    • Requires a 10-minute round brush or velcro roller blowout to achieve signature 90s bounce.
    • Maintains overall length while framing cheekbones and softening square or round face shapes.

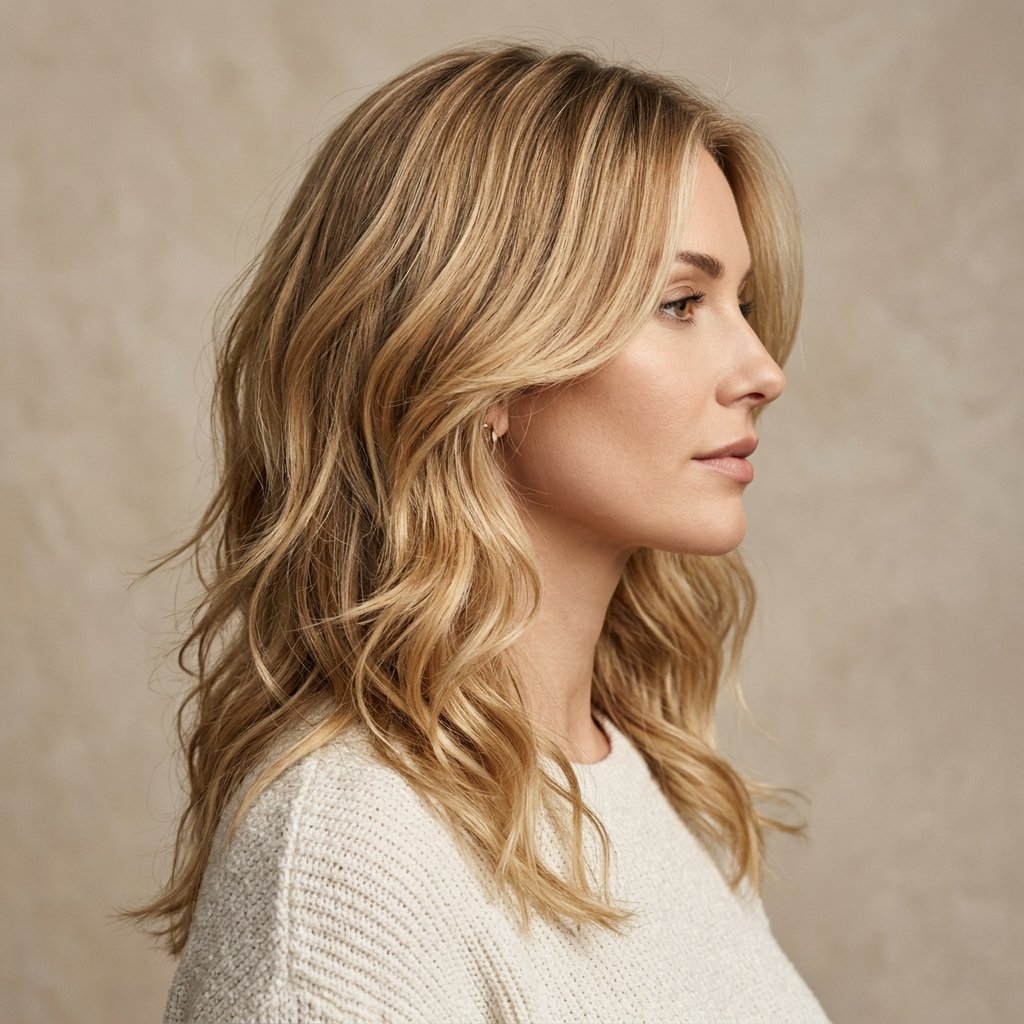
    Twist a butterfly cut up into a clip and it reads as a sleek lob. Shake it out and it falls past your shoulders in soft, cascading layers. That double life is the whole point of the cut, and it’s why it has been one of the most requested styles at salons for a few years running. You get the movement and face-framing of short hair without giving up the length or the ponytail.

    The mechanics are simple once you see them. A butterfly cut is built in two tiers: short layers cut around the chin and cheekbones sit on top, and longer, feathered layers fall underneath. The short pieces create that lob illusion and all the volume around your face; the long ones keep your actual length intact. It’s essentially a softer, glossier cousin of the 90s supermodel blowout crossed with a modern shag.

    Who it flatters

    Thick and medium hair are the easiest wins. There’s enough weight to keep the ends from going stringy, so the layers stack into full, cascading “wings.” Straight hair shows off the precise feathered lines; natural waves lean into the airy texture. Fine hair can absolutely wear it, but the layers need to stay longer and softer, or the bottom perimeter thins out and looks wispy.

    Face shape matters less than people fear, because the framing pieces do the adjusting. Chin-length front layers act like contour on rounder or squarer faces, softening a strong jaw and lengthening the neck. On oval and heart shapes, those same layers draw attention to the cheekbones and eyes.

    What to actually ask for

    The butterfly cut gets mistaken for plain long layers all the time, so be specific at the consultation. In our experience the requests that matter most are these:

    1. Short framing layers up top, starting somewhere between the chin and collarbone, to build the top “wing.”
    2. A seamless blend from those short front layers into the longer back, with no harsh disconnected step.
    3. Point-cut ends, so the layers finish soft and feathery instead of blunt and heavy.
    4. Long curtain bangs sweeping past the cheekbones for the signature silhouette.

    It also helps to point at your own face and name where you want the shortest layer to land, and to say plainly that you want the bottom perimeter kept thick with only light point-cutting at the tips. That one sentence prevents most disappointing results. If you’re still deciding on the fringe, our curtain bangs guide covers how to wear and style them.

    How it compares to its cousins

    Feature Butterfly Wolf cut Classic layers
    Vibe 90s glam, voluminous Edgy, shaggy Subtle, blended
    Top layer length Chin to collarbone Short crown Mid-length
    Volume Around cheekbones and roots Heavy at crown Even
    Styling effort Medium Low, air-dry friendly Low to medium

    If the edgier, more lived-in end of the spectrum appeals to you, it’s worth reading about the modern shag, which shares the layered DNA but wears rougher.

    Styling it at home

    The volume that makes this cut sing comes from a blow-dry, and it’s a fifteen-minute job once you have the rhythm.

    1. On roots that are about 70 percent dry, work in a little thermal mousse and a root-lifting spray.
    2. With a two-inch round brush, lift sections straight up, 90 degrees off the scalp, and dry from underneath to set the root lift.
    3. Roll the chin-length front pieces forward toward your face, then flick the brush back at the ends to make the winged shape.
    4. While the sections are still hot, wind them onto jumbo velcro rollers and clip. Let them cool completely, ten to fifteen minutes, so the shape sets.
    5. Take the rollers out, tip your head forward, shake the roots loose with your fingers, and mist a little dry texture spray under the layers.

    Match the tool and temperature to your hair. Fine or color-treated hair does best on a 1.5-inch ceramic brush around 300-320°F with a weightless foam. Medium hair handles a 2-inch brush at 350°F. Thick, coarse hair can take a 2-inch iron up toward 380°F with a smoothing balm. Curly textures skip the round brush entirely in favor of a diffuser, a cool shot, and a leave-in cream.

    A few things to avoid

    • Over-thinning fine hair. Aggressive thinning shears leave the perimeter sparse. Insist on blunt ends.
    • Skipping the cool-down. Hot hair holds no shape; if you don’t let it cool on the roller or hit it with the cool shot, the volume drops within the hour.
    • Heavy oil at the roots. Serums and rich argan oils above the mid-shaft coat the cuticle and weigh the interior layers flat.
    • Stretching out trims. The front pieces sit close to your face, so split ends show fast. Every seven to nine weeks keeps the shape honest.

    If you want to understand how layering decisions change with your face, our breakdown of layered haircuts by face shape goes deeper on the geometry behind cuts like this one.

    Frequently Asked Questions

    Can I get a butterfly haircut if I have fine hair?

    Yes, fine-haired individuals can wear a butterfly cut successfully. However, your stylist should keep the bottom perimeter blunt and use light interior slide-cutting rather than aggressive thinning shears to maintain density.

    What is the difference between a butterfly haircut and a wolf cut?

    A wolf cut is a cross between a mullet and a shag with heavy crown layers and tapered ends. The butterfly cut is far more polished and feminine, focusing on soft 90s blowout wings and preserving length at the perimeter.

    How long does styling a butterfly haircut take in the morning?

    With a modern round-brush blow dryer or overnight heatless curler set, styling takes approximately 10 to 15 minutes. On non-wash days, a quick 2-minute root refresher with dry shampoo and a claw clip revives the shape.

    How often should you trim a butterfly cut to maintain its shape?

    To keep the face-framing layers grazing your cheekbones and jawline cleanly, schedule maintenance trims every 6 to 8 weeks.

    Additional Details

    • Description: The butterfly haircut combines bouncy 90s blowouts with modern face-framing layers. Here is how to ask your stylist for it and style it at home.
    • Published: 2026-07-20T00:00:00.000Z
    • Updated: 2026-09-07T00:00:00.000Z

    Images

    • https://womensgo.com/articles/butterfly-haircut-inline1.png
    • https://womensgo.com/articles/butterfly-haircut-inline2.png
  • Fine Hair Volumizing: 7 Hairstyles That Add Instant Lift

    📌 At a Glance (Key Takeaways)

    • Blunt horizontal perimeters create the optical illusion of double hair density.
    • Switching to a deep side part immediately creates up to 2 inches of natural root lift.
    • Overnight dry shampoo application absorbs sebum before it can weigh down delicate follicles.
    • Avoid heavy silicones, deep conditioning masks at roots, and razor-feathered perimeter cuts.

    The most common mistake with fine hair is treating it like a problem to be fixed with more product. Fine hair does not need more; it needs less of the wrong things and a shape that works in its favor. Pile on heavy cream and oil and you drag delicate strands flat by noon. The fullness you’re after comes from the cut, from where your hair ends and how it’s layered, far more than from anything in a bottle.

    It helps to know what “fine” actually means, because people mix it up with “thin.” Fine describes the width of each strand. Thin describes how many strands you have. You can have loads of fine hair or very little coarse hair, and the two call for different strategies. Fine strands lack a thick core, so they bend and collapse under almost any weight, and because each follicle sits next to an oil gland, fine hair also greets sebum fast, which is why it goes limp and separates by afternoon. The goal is a cut that builds a solid edge and styling habits that hold air between the strands without leaving residue.

    Cuts that build fullness

    A blunt bob is close to a cheat code for fine hair. When every strand ends on the same horizontal line just below the chin or jaw, the bottom edge reads as dense, roughly twice as full as a feathered cut of the same amount of hair. Ask for a little interior weight removed so it still swings, but keep that bottom line solid.

    If you’d rather keep some length, a collarbone lob does the same trick a bit lower. The collarbone gives your hair a ledge to catch on as you move, so it lifts instead of clinging to your neck. Keep the ends only lightly textured.

    The fastest change costs nothing: move your part. Part your hair the same way every day and the roots learn to lie flat. Flip it to a deep side part lined up with the arch of your brow and the roots have to stand up in the opposite direction, and you get real lift without touching a tool.

    Curtain bangs help too, because long, heavy front pieces pull everything down and forward. Soft bangs swept across the cheekbones add width right at the temples, where fine hair tends to look sparsest.

    Two more worth mentioning. A layered butterfly cut with shorter face-framing pieces up top and longer layers underneath lets the crown lift while the perimeter stays dense, so you avoid the wispy, see-through ends that heavy layering can cause. And loose S-bend waves from a 1.25-inch wand on medium heat, leaving the last inch straight, push neighboring strands apart and create the air pockets that make hair look fuller. Pin-straight styling does the opposite.

    The blow-dry does most of the work

    Technique matters more than product here. A rough routine that actually holds:

    1. Shampoo the scalp with something lightweight and low on silicone, and let the suds rinse the ends clean rather than lathering them directly.
    2. Keep conditioner from mid-shaft down. Never on the roots.
    3. Blot with a microfiber towel instead of scrubbing with terry, which roughs up fragile strands.
    4. Mist a root-lifting spray along your part lines while hair is about 70 percent damp, and work a little mousse through the mid-lengths.
    5. Flip your head upside down and rough-dry on medium heat, lifting the roots with your fingers until you’re about 85 percent dry. Drying against the growth direction sets the roots upright.
    6. Flip back up, wrap the crown around a medium round brush in sections, hit it with warm air for ten seconds, then immediately with the cool-shot button for ten more. The cool blast is what locks the lift in.

    Products, briefly

    You don’t need all of these. Root-lifting spray and a dry texture spray earn their place for almost everyone. Mousse plumps the strand and works well combed through damp hair before drying. Dry shampoo is best applied before you see any oil, even the night before, so the starch absorbs sebum as it forms. Treat serums and oils with caution: a single warmed micro-drop on the ends is plenty, and anywhere near the roots it will flatten you.

    What quietly ruins it

    • Conditioning the scalp. Rich masks near the roots clog things up and read as grease within hours. Stay a few inches down.
    • Running tools too hot. Fine hair scorches easily; keep irons and wands under 350°F.
    • Over-layering the perimeter, which thins the very edge you want solid and leaves the ends looking see-through.
    • Leaning on heavy, non-water-soluble silicones that build up into a film and drag the roots down.

    A couple of small tricks worth stealing: while your hair is still warm from the dryer, park two or three large velcro rollers at the crown and leave them in while you do your makeup, then unroll for lift that lasts hours longer. And keep your hands out of your hair during the day, since the oil on your fingertips flattens roots faster than anything else.

    Frequently Asked Questions

    Does cutting fine hair shorter really make it look thicker?

    Yes. Cutting fine hair into a blunt bob or lob removes the dragging gravitational weight that pulls roots flat, instantly creating a denser, fuller baseline.

    How often should someone with fine hair wash their hair?

    Most fine-haired individuals achieve optimal volume by washing every other day with a gentle volumizing sulfate-free shampoo, using dry shampoo on alternate days.

    Can layers work on fine hair, or do they make it look thinner?

    Heavy, feathered layers can make fine hair look stringy. However, long, subtle interior layers combined with a blunt bottom perimeter provide bounce without sacrificing density.

    What is the best type of brush for blow-drying fine hair?

    A ceramic-coated vented round brush is best. The vents permit maximum airflow to dry roots quickly, while the ceramic barrel smooths without snagging delicate strands.

    Additional Details

    • Description: Flat, fine hair does not have to stay limp. Discover 7 effortless haircuts and styling hacks that create lush, long-lasting volume.
    • Published: 2026-07-19T00:00:00.000Z
    • Updated: 2026-09-07T00:00:00.000Z

    Images

    • (none listed)
  • Heatless Curls: How to Get Damage-Free Overnight Waves

    📌 At a Glance (Key Takeaways)

    • Dramatically eliminates heat damage, split ends, and moisture depletion caused by curling irons.
    • Requires hair to be approximately 80–85% dry for curls to set effectively overnight.
    • Satin and silk curling rods preserve hydration and eliminate morning frizz.
    • Results frequently last 48 to 72 hours with proper morning texturizing spray application.

    Wrap barely-damp hair around something soft, sleep on it, and unwrap waves in the morning. That is the whole idea behind heatless curls, and once you understand why it works, every method below becomes a variation on the same simple trick.

    Your hair holds its shape through two kinds of bonds. Disulfide bonds are the permanent ones that decide whether your hair grows straight, wavy, or coily, and nothing short of a perm changes them. Hydrogen bonds are the temporary ones, and they break every time your hair gets wet and reset as it dries. Curl a wet strand around a rod, let it dry in that curved position, and the hydrogen bonds lock into the curve. No heat, no cuticle damage, no vaporized moisture. That is also why a curling iron gives you a curl in thirty seconds and why it costs your hair so much to do it that way.

    The methods worth knowing

    There are dozens of gadgets, but they break down into four approaches, and the right one depends mostly on your length and the curl you’re after.

    The satin curling ribbon is the one you have seen all over social media: a long, foam-filled rod wrapped in satin that sits across your crown like a headband. You wrap sections back and away from your face in a braid-like pattern down each side and tie off the ends. Satin barely grips the hair, so there is almost no friction, and the result is a smooth, uniform blowout wave. It is the best pick for medium to long hair.

    No rod on hand? A plush robe belt does nearly the same job. The diameter is close to ideal for a relaxed curl, and the terry or fleece fabric wicks a little residual moisture as you sleep. The waves come out looser and more casual, which some people prefer.

    For shorter hair, bobs, and anyone who wants tighter spirals, flexi-rods win. Because each rod is separate and bendable, you control the tightness by choosing how small a section to wrap and how narrow a rod to use. Wrap half-inch sections vertically for ringlets. This is the only method on the list that genuinely suits shoulder-length hair and bobs.

    The gentlest option is two satin-scrunchie top knots. Split your hair down the middle, twist each half loosely into a bun near the crown, and secure with jumbo scrunchies. You wake up with soft, lived-in S-waves and, crucially, nothing rigid pressing on your head, so restless sleepers actually get through the night.

    How to get it right with the satin ribbon

    This is the method most people ask about, and most people fail it for the same reason: they wrap soaking-wet hair. It will not dry overnight, and you will wake up to damp, limp strands. Get your hair to about 85 percent dry first, cool and barely damp to the touch.

    1. Work a small amount of lightweight styling foam or a leave-in curl cream through the mid-lengths and ends. This gives the hydrogen bonds something to set around.
    2. Center the rod across the top of your head and clip it at the crown so it doesn’t slide while you work.
    3. Starting at your hairline, wrap a one-inch section over and around the rod. As you come back around, pick up a new section, the way you would a French braid, and keep going to the ends.
    4. Tie off each side with a satin scrunchie. Fold the tails up for comfort, or cross them behind your neck and pin.
    5. In the morning, untie, pull the rod straight up and out, and rake through with your fingers. Do not attack it with a fine-tooth comb, that is how you turn waves into frizz.

    Which method for which hair

    Method Wave style Best length Prep time Overnight comfort Hold
    Satin ribbon rod Bouncy blowout waves Medium to long 5 min Very good 2-3 days
    Plush robe belt Loose glamour curls Long 5 min Excellent 1-2 days
    Flexi-rods Defined spiral ringlets Short to medium 10-12 min Moderate 3-4 days
    Scrunchie buns Lived-in beach waves Any 3 min Excellent 1-2 days

    A few things make or break the result regardless of method. Sleep on silk or satin, because a cotton pillowcase ruffles the cuticle and works your wraps loose. Keep the tension snug from the very first turn at your temple, since loose roots give you flat tops and curl only at the ends. Finish with a light mist of dry texture spray rather than a stiff, alcohol-heavy hairspray so the waves still move. And always wrap away from your face; it opens up your features and mirrors the way a stylist would set a blowout.

    If your waves fall flat by afternoon, the usual culprit is humidity swelling the cuticle. A light anti-humidity spray on damp hair before you start helps them hold. In dry winter air the opposite happens, static and flyaways, and a weekly mid-lengths-to-ends oil mask settles that down.

    Frequently Asked Questions

    Can I do heatless curls on completely dry hair?

    Yes! If your hair is dry, lightly mist it with water from a continuous spray bottle or apply a light leave-in conditioning spray before wrapping to reset the hydrogen bonds.

    Why did my heatless curls fall flat after an hour?

    This usually occurs when hair was either too wet when wrapped (didn’t dry completely) or lacked a light setting foam or mousse to provide structural memory.

    Can heatless curls work on layered cuts and curtain bangs?

    Yes. Wrap shorter layers and curtain bangs on the very top of the rod, or wrap bangs around a separate mini velcro roller on top of your forehead for focused framing lift.

    Are heatless curls comfortable to sleep in?

    Satin ribbon rods and plush robe belts are filled with soft foam or cotton batting, making them very comfortable for side and back sleepers.

    Additional Details

    • Description: Wake up to salon-worthy curls without frying your hair. Learn the best overnight heatless wrapping methods for bouncy, healthy waves.
    • Published: 2026-07-18T00:00:00.000Z
    • Updated: 2026-09-07T00:00:00.000Z

    Images

    • https://womensgo.com/articles/heatless-curls-inline1.png
    • https://womensgo.com/articles/heatless-curls-inline2.png
  • Calm Morning Routine: 6 Steps to a Productive Day

    Calm Morning Routine: 6 Steps to a Productive Day

    The kettle is starting to tick. There’s a square of pale light on the kitchen floor, the house is still half-asleep, and for a few minutes nobody needs anything from you. That’s the feeling a calm morning is built around — not a five-step optimization plan, just a small pocket of quiet that belongs to you before the day gets loud.

    Most of us don’t lose that pocket because we’re lazy. We lose it because the very first thing we do is reach for the phone, and the moment the screen lights up, the morning stops being ours. Someone else’s news, someone else’s group chat, someone else’s beautifully lit breakfast — all of it pouring in before we’ve even had a glass of water.

    A calmer morning is mostly about protecting those first minutes, and about doing a little of the work the night before so the morning-you has fewer decisions to make.

    Start the night before

    This is the part nobody tells you: a good morning is usually assembled at about 9pm. Not with a rigid checklist, just a couple of small kindnesses to your future self.

    Lay tomorrow’s clothes over the chair. Set the coffee up so all you have to do is press a button. Move your phone charger off the nightstand and into the hallway or kitchen. That last one sounds fussy, but it changes everything — if the phone isn’t within arm’s reach, you can’t doom-scroll before your eyes are properly open, and you’re far more likely to actually get up.

    If your mornings feel permanently frantic, try nudging your alarm fifteen minutes earlier for a week. Not to cram more in. Just to give yourself a buffer, so a dropped spoon or a slow toddler doesn’t tip the whole morning into a scramble.

    Water before coffee

    You’ve been asleep for the better part of eight hours without a sip of anything, so you wake up a little dehydrated, and dehydration does a very good impression of tiredness. Before the coffee, drink a proper glass of water. Keep it by the kettle so it’s the first thing your hand finds. It’s a tiny thing that takes the fuzzy edge off the first half hour, and it costs you nothing.

    Then have your coffee or tea — and here’s the only real ask — have it without the phone in your other hand. Just the cup. Notice it’s warm. Look out the window. It feels almost silly written down, but a single slow drink at the start of the day is one of the most reliably calming things I know.

    Let your body wake up too

    You don’t owe anyone a workout at 6am. When people picture a “morning routine” they imagine forty-five sweaty minutes, decide they can’t face it, and skip the whole idea. But movement in the morning isn’t about fitness goals. It’s a signal — a gentle nudge that tells your body the day has started.

    Five minutes is plenty. Pick whatever you’ll actually do:

    • A few slow stretches on the rug, cat-cow, a forward fold
    • Stepping outside for a couple of minutes — the daylight genuinely helps you feel awake, and helps you sleep better that night
    • Dancing around the kitchen to one song while the coffee brews
    • A quick loop around the block if you have a dog, or just legs that want moving

    If it makes you feel a fraction more awake and a little more like yourself, it’s done its job.

    A few written lines, if you like

    This one’s optional, and I’d never pretend it’s magic. But before the inbox opens, some people find it steadying to jot down a couple of lines in a notebook — one thing they’re grateful for, one thing they’re quietly looking forward to, and a single word for how they want to feel that day.

    That’s it. Thirty seconds. It’s less about productivity and more about hearing your own voice before you hear everyone else’s. On a chaotic day it can be the difference between reacting all morning and feeling like you actually chose how to begin.

    When your morning isn’t yours to control

    All of this assumes a certain amount of quiet, and plenty of mornings don’t offer any. If there are small children in the house, the “first fifteen minutes to yourself” advice can feel like a joke.

    A couple of things that help when the morning belongs to everyone but you:

    • Waking a little before the household does, even by ten minutes, gives you a small anchor of quiet to stand on. Not to be productive — just to breathe before the noise.
    • If you feel groggy and heavy, splash cold water on your face. It sounds too simple to work, and it works anyway.
    • If your mind is already racing before your feet hit the floor, scribble the worries onto a scrap of paper. Getting them out of your head and onto the page tends to shrink them.

    Match the routine to the life you actually have, not the one on the internet. A single mother of two under five and a woman living alone and working from home are having completely different mornings, and both deserve to feel calm. That calm will look different for each of them, and that’s exactly as it should be.

    The one thing worth guarding

    If you take nothing else from this, take this: try not to touch your phone for the first fifteen to thirty minutes you’re awake.

    That window is small and quietly precious. The second you open messages or social media, you’ve handed the start of your day to other people — their requests, their moods, their highlight reels. Guard it a little. Drink the water, feel the warm cup, look out the window, and let the world in when you’re ready, not the instant your eyes open.

    A calm morning isn’t about doing more before breakfast. It’s about doing less, more gently. Pick one small thing from here — the glass of water, the phone in the hallway, the one song — and let it settle in for a couple of weeks before you add anything else. Calm builds slowly, and that’s fine. It’s supposed to.

    If you want to carry the same gentle energy into the rest of your week, our Sunday Reset Routine is a lovely companion piece, and if mornings are still a battle, 5 Habits for Easier Mornings has a few more small tricks worth stealing.

    Frequently Asked Questions

    Q: How early do I need to wake up for a calm morning routine?

    A: A calm routine does not require waking up at 5:00 AM. It only requires carving out 20 to 30 intentional minutes before your workday obligations begin, whether you wake up at 6:00 AM or 8:30 AM.

    Q: Should I drink coffee first thing in the morning?

    A: Dermatologists and neuroscientists recommend waiting 60 to 90 minutes after waking before your first cup of coffee. This allows your natural adenosine levels to clear, preventing the dreaded 2:00 PM afternoon energy crash.

    Q: What if I genuinely don’t have time for a 30-minute routine?

    A: Start with a ‘micro-routine’: 1 minute of deep belly breathing, 1 glass of water, and writing down your top priority for the day. That 2-minute investment transforms your mental state.

    Q: How long does it take for a new morning routine to feel natural?

    A: Research indicates habit formation takes approximately 21 to 66 days. Start with just one new habit (like delaying phone use for 15 minutes) for two weeks before stacking additional steps.

    Additional Details

    • Description: A morning routine should not feel like a boot camp. These practical strategies help you start each day with energy and intention, not anxiety and rush.
    • Published: 2026-06-20T00:00:00.000Z
    • Updated: 2026-09-07T00:00:00.000Z

    Images

    • (none listed)